free bootstrap template

Instructions for how to Build an
African Djembe Drum with Goat Skin 

I have re-headed over 300 djembes in the past twenty five years and discovered many tips and procedures to get the best result. Start with a sound shell with a good playing edge, good rope, and a fine African Goat skin!

While there are many ways of doing things, (and I have tried most of them) these work the best for me, and so my way must be THE RIGHT WAY ! {grin}. I typically do this whole job from start to end, in under two hours. I put the goat skin to soak in cool water right away and within an hour I have prepared the drum and am ready to mount the skin on the hide ring. You can take shortcuts here and there but you risk the quality of the result. Know this is a skill using both hands, and judgment, and don't expect a really good result until you've done several.
Follow the pages under the "Build" Menu!

First some definitions:

    Shell - The whole drum body

    Bowl - The top part of the djembe

    Trumpet - The base of the Djembe

    Head - Both top of the drum and the process of adding the skin

    Top Ring - The ring with rope near the Head

    Hide Ring - The ring the hide wraps around, second from the top

    Bottom Ring - The ring with rope at the bottom of the bowl

    Cradle - The series of knots on the top and bottom rings

    Half Hitch - The first half of tying your shoes

    Neck end - The end of a goat skin from which the hair all flows away from

    Tail end - The end of a goat skin from which the hair all flows toward


Here is a tool list:

    Cloth or leather gloves

    Athletic Bandage

    Custom cloth for rings

    Small locking pliers

    Needle nose pliers

    Scissors

    Smooth curved blade knife

    Razor knife

    Bic or Lady Bic Razors

    Pulling stick or Rope Wizard

    120 or finer sand paper

    butane lighter

    100 - 120 feet Drum rope

    Goat Skin

    Piece of Bees Wax


Mobirise

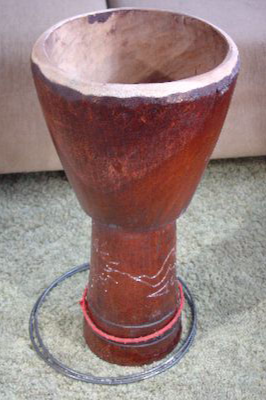
Inspect the Djembe Drum shell

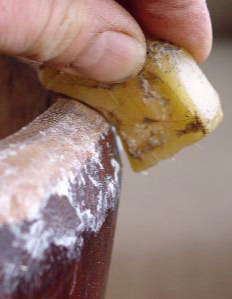
You should have the djembe drum body all ready to go. Here I touched up and leveled out the head profile before beginning. To level it, put on a course level concrete floor, head down, and rotate the body until all surfaces touch. I round off with a belt sander, but you can use a good rasp as well. Many drums have the bottom ring welded on. A local welder can help you out if you need rings or to make the existing ones smaller to fit more snug.

Mobirise

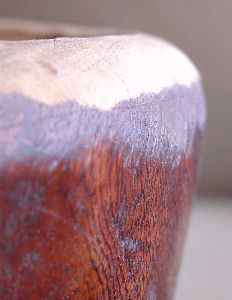
Rework the Djembe Shell Top Edge 

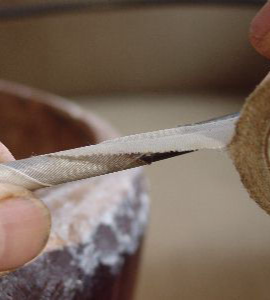
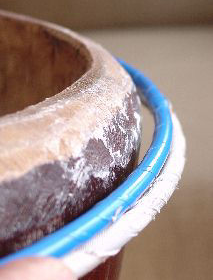
This is what a good head edge profile should look like. a look at your thumb sideways is a good guide. In hardwood drums this is the easiest area to carve thin and sometimes carvers try to make up for weight here, leaving a sharp uncomfortable edge. Consider lowering the whole edge down till you find thicker wood to allow some rounding. Theoretically the edge shouldn't matter, your hand should not hit it. No big consolation when you do however! This edge just has a tiny bevel on the inside to assure a clean edge for hide to take off from the wood.
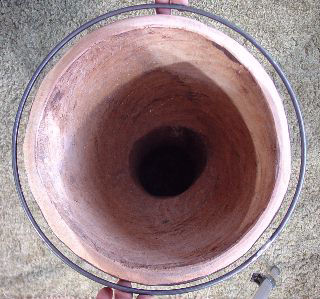
Mobirise

Inspect the Rings

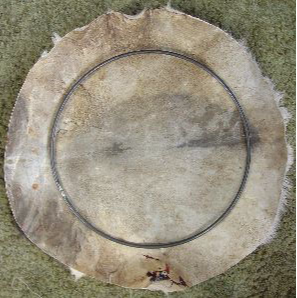
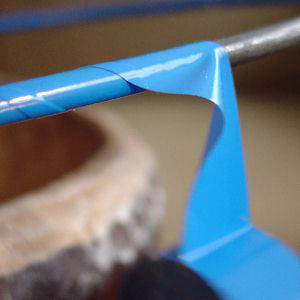
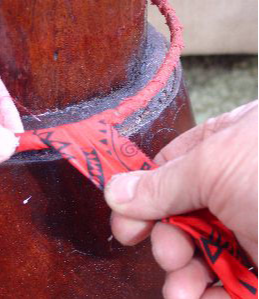
This view shows you the typical spacing of the rings around the drum. Typically I leave about 5/8" total gap (just under 3/8" on each side). If your drum is oval, I hand bend the rings (a knee works good here)so they match the shape. If your drum has no decoration that determines front and back for you, you might consider aligning the goat skin spine on the widest sides of the oval. The thicker skin at the spine may help pull your drum back round over time.
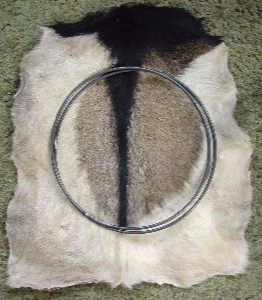
Mobirise

Check the skin

I check to see that the skin is big enough here. This one is marginally big enough. I wanted to use up this smallish hide. a little more room would be better, and if I have the choice I cut the circle nearer the neck end (above in photo) than the tail end. I tend to center it like this if the neck skin is a little too thick compared to the rest.

Mobirise

Cut Circle

Now I flip the skin and cut out my circle. I wish I had more room outside the rings because I want to be able to trim it a little and also wrap it back down over the rings when finished.

Mobirise

Wax the Edge

Take a bit of Bees Wax, or any candle in a pinch, and wax the head edge profile. It coats and will effectively lubricate the surface and allows the hide to slide over more easily when tuning. Remember wet hide makes glue, and you don't want the goat skin glued to the edge here!

Mobirise

Prepare the Djembe Hide and Rope Rings 

I always wrap the rings. I believe rust forming against the goat skin creates sharp particles, and is a major cause of head failure. Note I wrap "on the bias" the hide ring with textured medical cloth tape.

Mobirise

... and then also the top ring with electrical tape.

Mobirise

Ring Sizes

If I have a choice, I make the top ring a little smaller than the hide ring, like this. If they are equal that is fine too, as long as they are snug. Never put a larger ring in as the top ring, it may pull right over the hide ring as you tune the drum later!

You can see there is just barely room between the top ring and the drum body for cloth, cradle rope, and two layers of skin (the skin comes over the wood edge, goes behind the top ring, wraps under - around the hide ring and the goes back behind the top ring, making TWO layers there) .

Mobirise

Cloth Wrap Start

Here is how I start the decorative cloth wrap. it is about an inch wide but I fold over what becomes the exposed edge as I wrap on the bias, making one side have a hem. All it take is a little glue to hold the start, the first few rounds, and then keep tension on as you wrap.

Mobirise

Cloth Wrap Finish

As I get to the end, I fold the other edge in as well, cut the cloth end at the wrap angle, add glue and smooth it around. If it takes two pieces just end one and restart over the first's ending.

Mobirise

Bottom Ring Wrap

Here the drum is flipped upside down, and I am going right over the old ratty African cloth installed without the folded hem.

Now to roping the cradles, tying knots and threading the vertical rope. It is the part of this task that is the most scary for your first time. If you are re heading a drum that was badly roped, consider ripping it all out and starting fresh!

I measure out a length of rope. For this drum with a circumference of 42" I multiplied by a short 5 and started with 200". You can use a foot shorter length for the bottom cradle rope. This drum has 24 knots ( I like to use even numbers here: 24-30) and if you use more knots you'll need more rope! I like to use extra here,as then I don't run short and I use the extra to tie the self tightening knot which takes more rope. I plan to have 16" additional extra that becomes the skeleton of a carrying handle later.


Now Move on to the "Roping" Page!

Address

Hawkdancing Studio
42  1-1/2 St
Clear Lake, WI 54005

Contacts

Email: hdtalktous@gmail.com 
Phone: 715-263-2756