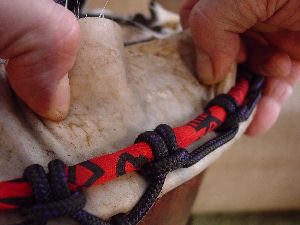
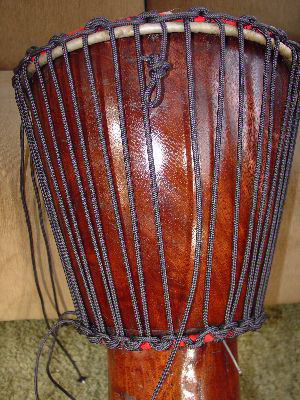
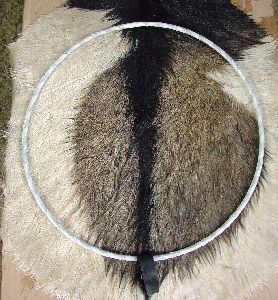
free html templates

Instructions for how to Mount the Head of an
African Djembe Drum with Goat Skin 

Mobirise

Align Hide Ring

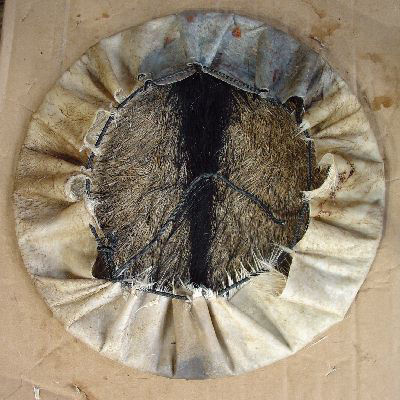
Now I lay out the skin. The neck end is where I'll play (the thickest skin at 12 o clock) I have aligned my tape with the tail end spine, so when O put it on the drum and line it up with the drum design, my oval ring will be aligned with the oval of the drum it was bent to follow. If your drum is pretty round and you have no design to align to, no worries here, just slap it the hide ring on the hair!
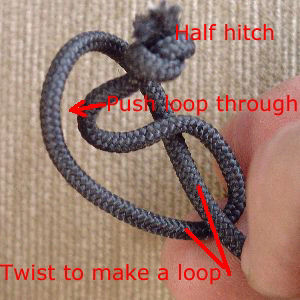
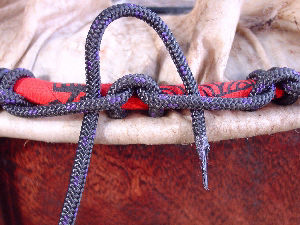
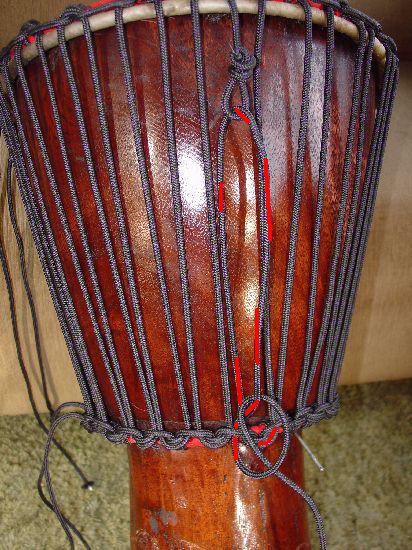
Mobirise

Loop Knot

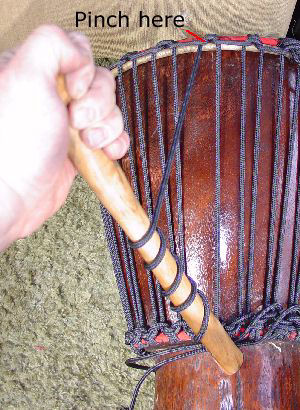
Oops, just one more knot to show you. You need a knot for loops that won't close with tension. You can make a loop at the end and just tie a half hitch with the doubled rope, but this knot is nicer. First tie a half hitch in the very end of the rope and pull it tight. Then ahead of the knot twist the rope 1/2 a turn to form a loop. Take and push a loop of rope JUST ahead of the knot and push the loop through twist loop, leaving the knot right on the outside of it.
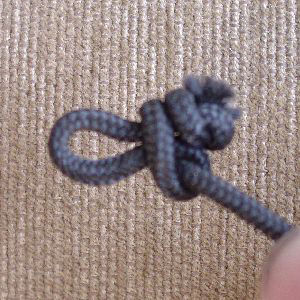
Mobirise

Finished loop Knot

Snug it up and the loop pushed through becomes the non closing loop. With practice you can make just the minimum size loop with the minimum amount of rope...and important quality to get you out of trouble sometimes! This knot can also ALWAYS be untied, another great characteristic!
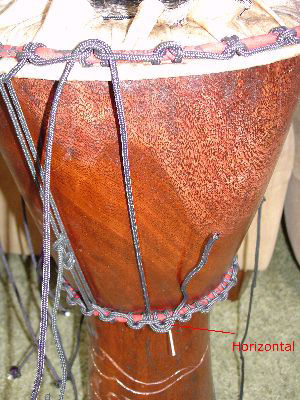
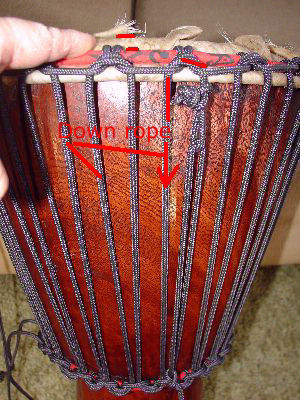
Mobirise

Thread Draw String

I make this knot on a say 30" piece of rope (hey make four, you'll need another three soon anyway!) and using it like a needle, thread it in and out of your 16 slits you made in the hide edge, making a draw string around the hide ring.

Mobirise

Tighten Draw String

I slide the knot in as far as it will go, run the needle end of the rope through my non closing loop and pull back. I can snug the draw string right up, centering the hide, and then do a half hitch right at the loop to hold it snug. You can barely see the tape on the hide ring that marks proper alignment with the spine in this case.

Mobirise

Layout Assembly

TNow i lay it all back on the drum, take a deep breath and admire the promise of a great drum with all the careful craftmanship I've used so far.

Mobirise

Add Temporary Ropes

Remember those other three ropes with a loop? now you need them. I make three ties, dividing the circumference in three, that secure snuggly the top and bottom ring through a cradle rope. Here I also put in three small nails to hold the bottom rope ring in the groove. If the bottom ring is sloppy on the trumpet, this can be a real aid to ending up with the bottom ring centered instead of pulled way to one side. 

Mobirise

Check the skin for Folds

Now go all around the hide edge and make sure there are NO FOLDS where the skin wraps around the ring. The one pictured really isn't bad, if it came around the bottom to the drum side, it can be deadly. I believe behind rusty rings, and too large rings, a fold at the hide ring will greatly shorten head life.

Mobirise

Smooth Out Folds

Just slip your fingers behind the fold and spread each edge outward behind the fold, and it will smooth out and disappear.

Mobirise

Start Threading Vertical Rope

We are ready to thread the vertical rope. If working off a spool I pull of about 30 -40 feet and melt an end form a nice threading needle (Lick fingers and twist while melted). I pick a spot just to the right of a temporary tie and begin threading to the right. I start by going up through a loop and back down through the adjoining loop.  The rope goes down to the bottom ring and goes in the loop that will make the rope vertical and then back up the neighboring loop.

Mobirise

Cloth Wrap Finish

Now all the 30 -40 feet of rope is worked through this pair of upper and lower knots. Actually I like to pull through downward after exiting the top knot...so I would get to the next knot on top and work this all through to get started.

Mobirise

Check each Knot as you thread!

This detail shows the bottom ring. You need to check each and every pass through the cradles. You can tell when they are right when the rope aligns with the horizontal center of the knot as it passes through, and each loop will end up having TWO vertical ropes through it. One as the rope goes up, the other as the rope comes back do

Mobirise

Ring Sizes

IThe threading progresses...
notice how the horizontal knot centers line up.. 

Mobirise

Check your Work

Two ropes through each loop, centers aligned. CHECK YOUR WORK, if you miss a loop, you will have to undo back to your error and then re do it !!!!

Mobirise

Keep Going

Just remove the temporary ties as you reach them.

Mobirise

Threading Through Double Cradles

Don't be confused when threading through the self locking knots, just treat them exactly the same. When you are done, they will just have three ropes horizontally. You may have to spread the loops with a needle nose pliers, especially at the bottom, take your time, get it right!

Mobirise

Threading Complete

I guessed almost perfectly how much to take off the roll, only one loop short of finishing. I end after going through the last top cradle knot i can reach with a loop knot in the end of the rope. Now working off a roll, I take about 2.5 feet for each up and down pair of ropes I am short (if I was 8 short it = 20 feet) then I add another 8 feet for tuning rope. I figure by the time I get it all snugged up I will then have about 12 extra feet for tuning rope.

Mobirise

Tie off to Bottom Cradle

Now I have cut the rope off the spool so I can finish from the other direction. I like to end by going up through the last bottom cradle to my loop near the top cradle knot. Then I just pass through, go back to that last bottom cradle, go behind again, and tie there with a half hitch. By doing this I have a minimum of knotage in the vertical ropes, making them easier to cross when tuning. I also have the end of the rope at the very bottom of the drum so my tuning diamonds can start as low as possible. 

Mobirise

Snug Ropes Moving from your Loop Knot

Note the head is (at most) about a finger thickness below the playing surface.

Now take the slack out be just snugging everything to the left. I start at your loop knot end, and pull down on the vertical on the left side of the top cradle knot. I call this left one the "down rope", since I pull it down! Usually just pulling that down rope is enough to tighten that pair, no need to pull up on the "up rope".

Mobirise

Check the Vertical Alignment

Now if your top and bottom cradle knots were all exactly evenly spaced along the rings, all your vertical rope pairs are perfectly vertical. Check this by putting the drum upside down and looking down at it from above. as your eye goes around the drum you may see some straight up and down and some leaning one way or the other.  Decide if the greatest amount of verticals would indeed be vertical if the top ring was shifted a little left or right. Here I tapped it clockwise slightly on the knors with a rubber hammer and at this point it will move.

Mobirise

Hand Tighten Verticle Rope

Go around to the left from the end loop again. Keep the head even as you go, but now exert firm pressure. I pull the down rope out and then lean down on it with the heel of the other hand. You might also want gloves at this point.

Mobirise

Tighten Rope With Tool

Go around another time with a mechanical aid. I put a finger where the down rope emerges from the cradle knot to keep the rope from slipping back while I move to the next one left. Once I get a little tension then you can let it go. You are now seating those cradle rope knots into the skin to really grab the skin as it dries. .

Mobirise

Another Method

Here I am using a piece of closet pole as the tool. A hammer handle works, too!

Mobirise

Nice and Tight

When you are done I like to be AT MOST a thumb width below the playing surface with the top ring. It will go down a little more with the final tightening when dry. If you push on the center of the skin it should feel darn taught at this point.


Now Move on to the "Shaving" Page!

Address

Hawkdancing Studio
42  1-1/2 St
Clear Lake, WI 54005

Contacts

Email: hdtalktous@gmail.com 
Phone: 715-263-2756